
These days, going out to eat is a fraught proposition. Is your favorite place open for dine-in? If it is, do you feel safe going there? We all truly need a break from our great indoors and sometimes the best way to have a great time eating out is just a few steps away.
If you haven’t been eating out in your back yard much but really feel like it’s time let’s start with a few basic questions. Do you have a grill that never gets used? Do you wish that you could enjoy dining out in your garden but find it’s more trouble than it’s worth? I totally get it! A great outdoor kitchen is one of the top issues clients are itching to solve for. I’ve come up with a handy guide to help you get cooking and eating out.
The best way to maximize a garden, after all, is to enjoy meals in it. There is nothing like being outside at the end of long day, and enjoy the beauty and serenity of a fabulous garden. With fresh grilled foods and crisp cool beverages you not only feed the body but also the soul. And we all need a little more of that these days.
Sounds great doesn’t it? But somehow there always seems to be a barrier to that picture perfect scene. Too many bugs. It gets dark early and you can’t see anything. It’s a pain to clean up. It’s a hassle to keep walking back and forth: in for the tongs, out to cook; In for the sauce, out out to be with your guests. In for the foil, out to tidy up. Am I touching on any of the big ones for you? If so, let’s dive right in.
Here’s my super simple rule book for a fantastic outdoor kitchen
1. Know Thyself…or thy client:
How often do you want to eat outside? Every weekend? Once a month? Be realistic. Let’s not build the church for Easter Sunday, as the saying goes. If you love the idea of eating outside often even if you haven’t done it much before, then it’s totally worth budgeting for a complete kitchen. If you’re thinking of only grilling a bit in the summer, and only when you have guests, a pared down version will suit you just fine.
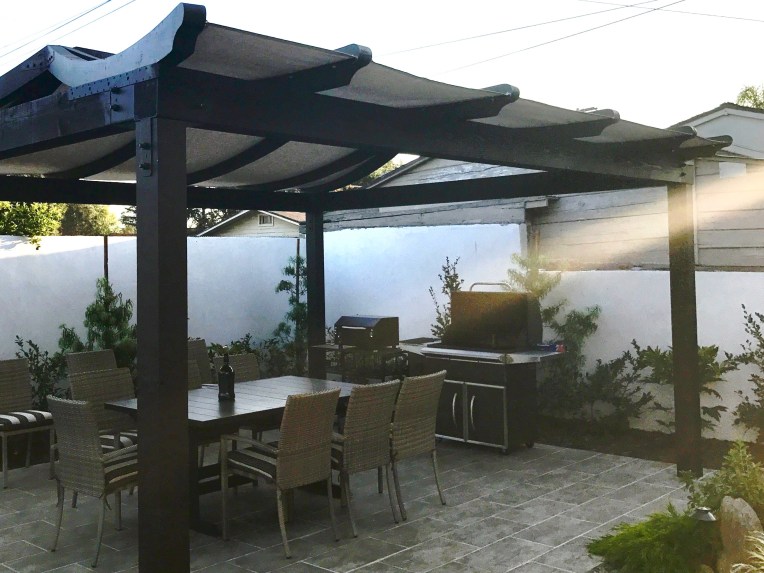
2. THE COMPLETE OUTDOOR KITCHEN


Grill (duh!). I recommend stainless steel, at least a 32” size. Minimum 4 burners, warming rack, lights, and grease tray that is removable.
Gas or Propane? The answer is a question: High cost now or high cost over time? It’s expensive to bring a gas line particularly if it is far from the house. Propane is comparatively inexpensive. If you are a daily or even weekly griller though, it is well worth it to choose gas.
Smooth countertops. No grout. It sucks to clean!
Counterspace Give yourself as much as possible. You want to fit a large platter on each side of the grill—one side for the prepped food, the other for the finished product. If you can manage 24” on either side great. If not, 11” on one side and 30” on the other.
Storage 3 drawers, a trash enclosure, and a double door cabinet at the base, minimum. I promise you will find plenty of things to fill them up.
Sink Some people avoid this due to the cost of bringing the water and drain line. But it’s super handy and prevents you from needing to run back and forth to the house! Save a tiny bit by not including hot water.
Outlets You will typically need at least two outlets that will be used for everything from a blender, to charging your phone.
Lights It is the only way you will use it all year long!
Construction method CMU (concrete masonry unit) are the big blocks you see walls made out of. They are inexpensive but cut down on your internal space. An alternative is steel framing with concrete board that gives you more storage space inside. Either choice allows you to add stucco or stone veneer for a beautiful finish.
- Fun extras to complete your complete outdoor kitchen
- Speakers because, music!
- Ceiling Fan if you have a cover—keeps the air circulating, and the bugs at bay
- Citronella candles, speaking of bugs.
- Extra hidden storage is always a good thing.
- Heaters allow you to use your outdoor kitchen all year long
- TV totally not my thing when outside but some say it’s a must for watching the big game, or the big fight, or your favorite gardening show.
3. SIMPLE GRILLING
Free standing grill Choose one that has wing-like side shelves. This allows you to have a plate right next to you while grilling.
Solid paved surface The cooking area should be on solid ground such as concrete, leveled brick or tile etc. Gravel, turf and open soil is not a great place for grilling. It is unstable and unsafe.

Weatherproof storage is a must! Purchase or have some units made. Hollow benches with flip up lids are great because they serve two purposes. There should be enough room for long grilling tools, your kit of spices, plates, utensils, napkins, placemats and cloths to wipe surfaces down.
Trash Have a small decorative receptacle nearby.
Lights Any landscape is made better with lighting. The investment is even more valuable if you plan on eating out.
Two outlets at least. If you don’t have an overhead structure you can literally have them placed discretely on the ground with a waterproof cover.
4. Placement
Placement of your outdoor kitchen is the key to success! You want your location to be easily accessible to and from your indoor kitchen. Going around corners, and navigating around obstacles will definitely put a damper on your outdoor dining plans! (Read more about this in my previous post, Draw Them In Deep). Best case scenario, it should be very close to the house. Next best is deep in the garden but with a very direct path of travel.
If you’ve followed my advise so far, you’ll have everything you need to enjoy eating out night after night! Eating out, quarantine style, just got way more exciting.
As we say in Japan before enjoying a delicious meal, Ita daki masu!